Comprehensive Guide to Understanding Micro Switches in Coffee Makers
I. What are micro switches?
i. Definition
Micro switches are electronic switches activated by a slight physical movement, such as a pressure change or a small force. These switches are widely used in many industries, including automotive, aerospace, medical equipment, etc.
ii. Purpose of micro switches
The purpose of micro switches is to provide a reliable and accurate way to detect changes in physical conditions. They are often used in safety devices to detect when doors or gates are open or closed or to activate alarms or other warning systems.
iii. Types of micro switches
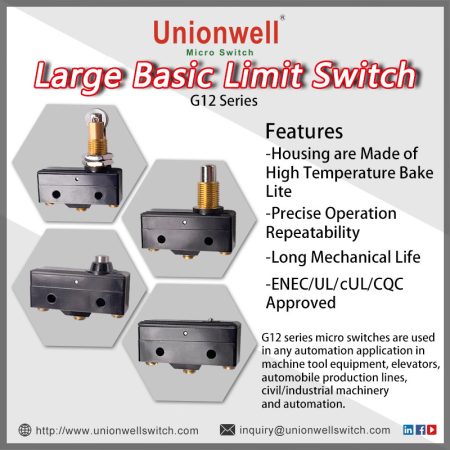
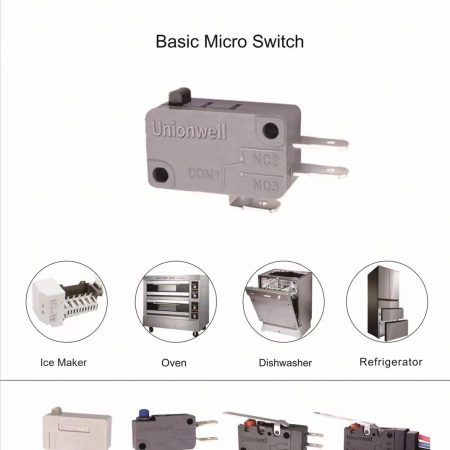
There are several micro switches, including snap action, limit, and basic switches. Snap action switches are the most common micro switch type and are often used to detect if a door is open or closed. Limit switches trigger equipment when a limit has been reached, such as when a conveyor belt has reached the end of its track. Basic switches are simple on/off switches commonly found in household appliances.
II. The components of micro switches in coffee makers
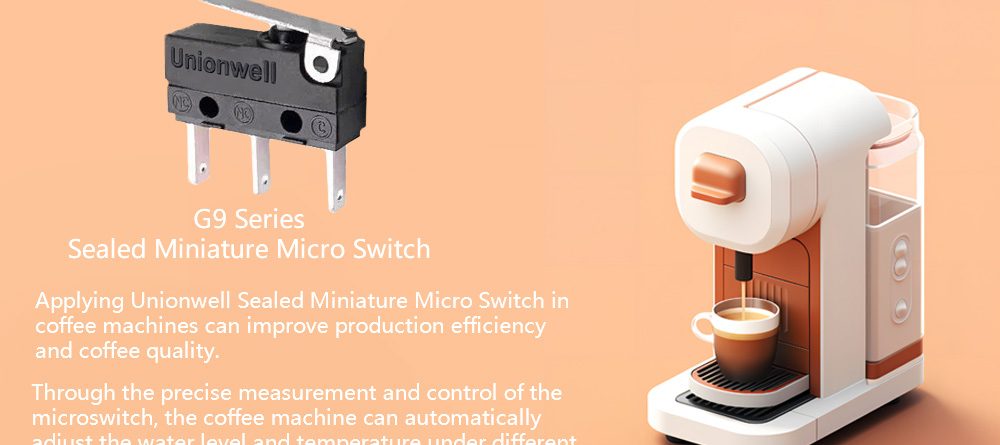
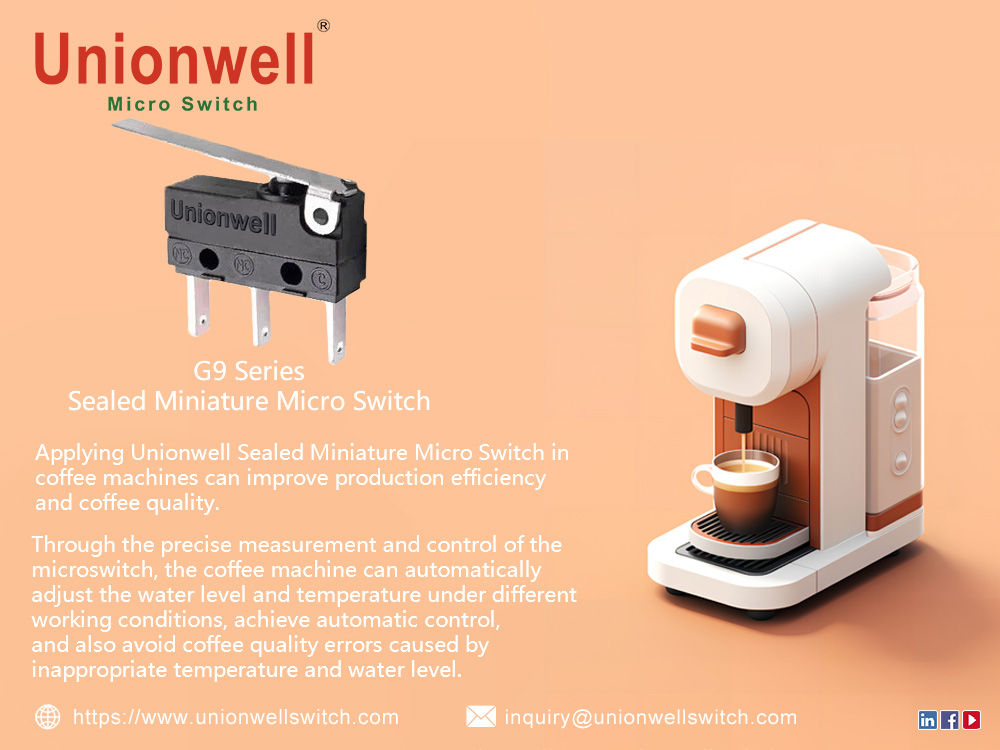
Coffee makers are an essential part of many people’s daily routines. They provide a quick and easy way to get that much-needed caffeine fix in the morning or whenever needed. But have you ever thought about the technology behind these machines?
Micro switches are a crucial part of coffee makers that allow them to function properly. They are responsible for controlling the flow of electricity from the power source to the coffee maker’s heating element, which heats the water that makes the coffee.
The components that make up a micro switch in a coffee maker are as follows:
1. Lever or Button Actuator – This is the part that the user interacts with to start the coffee-making process. It could be a lever that is pulled down or a button that is pushed.
2. Contacts – The contacts are the electrical conductors that connect the power source to the heating element. When the lever or button is activated, the contacts close and allow electricity to flow through them.
3. Spring – The spring keeps the contacts apart when the lever or button is not pressed. This ensures that electricity is not flowing when it is not needed.
4. Housing – The housing is the outer casing containing all the other components. It provides protection and keeps everything together.
5. Soldering Tabs – These connectors allow the micro switch to be attached to other components in the coffee maker. They are usually attached using solder.
Without these components, coffee makers would not be able to work. Micro switches allow users to control the heating process easily and ensure their coffee is brewed perfectly.
III. Understanding the functions of each component in coffee makers
Coffee makers are an indispensable part of many people’s daily routines. A perfectly brewed cup of coffee can be enjoyed with the press of a button or the pull of a lever. But have you ever stopped to wonder how these coffee makers work?
i. Lever/button actuator–the importance of proper adjustment
Firstly, the lever or button actuator activates the brewing process. This component must be adjusted properly to ensure that the correct amount of pressure is applied, which determines the strength of the coffee. A well-adjusted actuator can result in strong coffee.
ii. Contacts–the function of opening and closing the circuit
Next, we have the contacts responsible for opening and closing the circuit. This is necessary to allow the hot water to flow through the coffee grounds and extract the flavor. With properly functioning contacts, the brewing process would take place. Keeping the contacts clean and free from debris is important to ensure they function correctly.
iii. Spring–the role it plays in resetting the switch
The spring is another important component in coffee makers. Its role is to reset the switch after it has been activated, allowing multiple cups of coffee to be brewed. A weak or broken spring can result in a switch that does not reset properly, leading to issues with the brewing process.
iv. Housing–protection of the internal components
The housing of the coffee maker is also important as it protects the internal components from damage. It also provides a stable base for the coffee maker, preventing it from tipping over during use.
v. Soldering tabs–connecting the switch to the circuit board
Finally, we have the soldering tabs responsible for connecting the switch to the circuit board. This ensures that the brewing process can occur and is essential for coffee makers.
Understanding the functions of each component in coffee makers is important for ensuring that they function properly. Proper lever or button actuator adjustment, keeping the contacts clean, ensuring that the spring is working correctly, and protecting the internal components with the housing are all essential for a good cup of coffee. So, the next time you enjoy a perfect cup of coffee, you can appreciate all the components that work together to make it possible.
IV. Troubleshooting micro switch issues in coffee makers
Coffee makers are a staple in many households, providing a quick and easy way to start the day with a fresh cup of coffee. However, these handy appliances sometimes experience issues with their micro switches. Luckily, troubleshooting and fixing these issues doesn’t have to be a daunting task.
i. Common Issues
1. The coffee maker won’t turn on: This is a common issue caused by a faulty micro switch. If the switch isn’t working properly, it won’t register that the coffee maker should be turning on.
2. The coffee maker isn’t brewing: If you’re having trouble getting your coffee maker to brew properly, the micro switch could be to blame. This is because the switch is responsible for activating the brewing process.
3. The coffee maker won’t shut off: If your coffee maker is stuck in the “on” position and won’t shut off, the micro-switch could malfunction. This means that it isn’t properly registering the “off” position.
ii. Steps to Troubleshoot and Fix Issues with Micro Switches
1. Unplug the coffee maker: The first step in troubleshooting any issue with a coffee maker is to ensure it’s unplugged from the power source. This will help prevent any accidents while trying to fix the problem.
2. Locate the micro switch: Depending on the model of your coffee maker, the micro switch will be located in different areas. Consult your coffee maker’s manual to find the switch.
3. Check for debris: Debris can get stuck inside the switch, preventing it from working properly. Use a toothbrush or soft-bristled brush to clean out any debris.
4. Test the switch: Use a multimeter to test the micro switch’s functionality with the unplugged coffee maker. Check to see if it’s opening and closing properly.
5. Replace the switch: If you’ve tried all the above steps and the micro switch is still malfunctioning, it’s time to replace it. You can purchase a replacement switch online or at a hardware store.
Troubleshooting and fixing micro switch issues in your coffee maker is a manageable task! With the simple steps mentioned above, you should be well on your way to enjoying your morning brew once again. Just be sure to practice caution and safety while working with electrical appliances. Happy troubleshooting!