You Should Test A Micro Switch This Way

Microswitches may be small in terms of their sizes, but they sure have a way of ensuring an appliance works smartly and efficiently. As such, anytime it doesn’t go well, most people who have it in their machine want to consult professional help as soon as possible. Although that is not a bad idea, you will find out today that it doesn’t take anything to have your damaged micro switch fixed.
You have to know what is expected of you so that you don’t damage your micro switch for good. As you can guess, you stand the chance of gaining a good amount of money when you do this yourself.
The Reason For Testing Micro Switch
We can offer three or five micro switch samples for free. Before making your whole micro switch order plan, you must do your best to test the micro switch samples.
All the parameters of the microswitch sample will be part of the order contract. Only the micro switch sample passes the severe testing, and the micro switch manufacturing will be smooth! We will offer your high-quality and high-reliability micro switch as the plan.
Testing micro switch firstly is vital for you and us. We must pay more attention to it. Let us learn how to test your club car microswitch:
Club Car Micro Switch Test
Micro Switches are used in many golf cart applications. They are used at the accelerator pedal to signal to the solenoid that you have depressed the pedal and are ready to go. The solenoid sends power to the controller to move the cart in an electric golf cart.
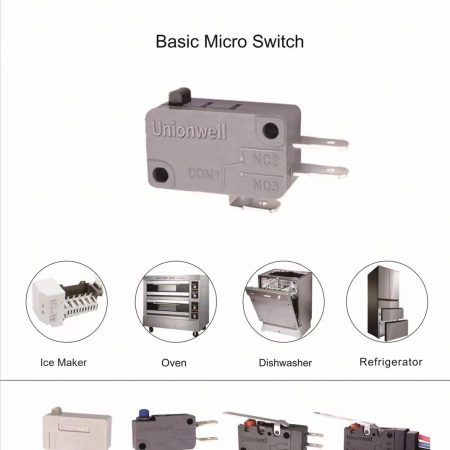
The micro switch is widespread in the club car. When you receive the unionwell G5 basic micro switch samples, you should first test the micro switch.
The only tools required to test your club car micro switch are a digital or analog OHM meter and essential miscellaneous tools to remove the micro switch. A basic multimeter should be able to test for resistance.
You can test the function with a voltmeter if you first verify 36v in on the supply side of the switch, then mechanically trigger the switch and test for 36v on the output side. With the multimeter set to continuity or ohms, you can disconnect both sides of the switch and connect it to the meter.
Remove Micro Switch From The Club Car
You should remove the micro switch in the club cart. And after turning off the power of the club cart, you can find the position of the micro switch. If you have found the desired micro switch to be removed, you need essential tools to do the job.
Check Over The Removed Micro Switch
Now you have removed the micro switch; you should examine the micro switch. Is it sticky? Is it burned/charred? Does it smell? Is the body cracked or damaged? Does the lever stick when pressed? If you notice any of these signs, replace the micro switch regardless of its function.
Burned or charred micro switches tend to be in older machines mostly.
About Micro Switch
The essential micro switch has two different positions. One position is “NO,” eller “Normalt åpen,” and the other position is “NC,” eller “Normally Closed.” “NO” means an open or no connection in the micro switch. As you may have guessed, “NC” means a connection is made inside the micro switch.
When the button/lever on the micro switch is activated or pressed, the connection(s) inside the micro switch reverse, which means a switch that is “NO” will have a connection when pressed, og “NC” connection will now be open.
Are You Eager To Understand How Microswitches Work?
You can quit trying to rack your head because you would be exposed to all you need to know via this post. You will learn to figure out if a microswitch is not working well. Go through the subsequent paragraphs carefully, and learn about a micro switch to avoid guessing while working. Become a micro switch repair pro today with these proven tips!
Possible Micro Switch Faults
Before you settle for the option of practically looking at your micro switch, you could start by identifying specific faults capable of making the switch operate below its capacity. Some marks can be fixed, while nothing can be done about others. Whether a professional or specific problem is meant to bring the micro switch’s life to an end and damage it for good doesn’t matter who is trying to fix the switch.
Some microswitch problems can include low-quality parts/components getting burnt due to high temperature, depreciation, and working and stopping abruptly. While there are other problems, almost 80% of all issues that plague micro switches fall within these categories.
You Can Check For Existing Faults.
Quit being scared of detecting faults in a micro switch because it is something anyone can accomplish. It is simple because no specific technical knowledge is required to complete it. We have highlighted some tips that will serve as a guide to help sort out micro switch issues. Apply any tips where necessary, and I’m sure the rest will be history.
How To Test A Micro Switch
Steg 1 – Separate The Plastic.
Microswitches are encased by plastic material. We can use several means to achieve this one thing. It is essential since it will help give you a clear view of the content of the microswitch. Den veien, you can easily see the assembly of the microswitch components structure. You can achieve the act of separating the plastic components via a drilling tool.
Not all microswitches need to be opened with a drilling tool. Some have been manufactured, and we can dismantle them without drilling tools. For a micro switch that requires drilling, gently drill through to separate the microswitch materials accordingly. Some microswitches are bound together through friction. They will not split even while screwed to their support bracket.
Steg 2 – Take Pictures.
Are you thinking what I’m thinking? Snapping the microswitch after separating the materials is of utmost importance because it will help you ensure that the microswitch is not damaged beyond its current state. Several people have been frustrated in an attempt to fix their micro switch. That’s because they cannot rearrange the microswitch the way it is supposed to be. So the act of having a photograph of the microswitch is compassionate. Den veien, you can know how the items of the microswitch were before you took the parts apart. With the help of a picture of the internals of your micro switch, you won’t need to rack your head to figure out how the components were first arranged. It saves you all of that stress and more! Your mobile phone camera is enough to do the job.
Steg 3 – Check The Components.
You must check through the microswitch components at this stage to know which one is bad. Please go through them, so you will not need to guess where the fault lies. The inability of the microswitch to work accordingly may be the fault of one component and not all. Check to make sure the components are contacting properly since that can also be a source of the problem. Replace any damaged part, and that will be good enough.
Steg 4 – Clean The Components
Dirt is bound to accumulate in a microswitch when you use it for a long time. If you want your microswitch to function optimally, you must clean the contacts appropriately. Should any component have stubborn stains, soak in water to eliminate the colors. This method is so effective that it is regarded as better than other methods for getting rid of stubborn stains.
Steg 5 – Re-assemble
After confirming and resolving whatever could be wrong with the microswitch, this is the part where you start putting it back together. To do this appropriately, look at the picture you snapped and make sure you arrange everything as it is there.
Unionwell Micro Switch Manufacturer
Huizhou Unionwell Sensing & Control Electronics Co., Ltd spesialiserer seg på kvalitetsmikrobrytere for the automotive industry og white goods of home appliances. Hovedprodukter inkluderer grunnleggende mikrobrytere, vanntette brytere, lufttrykkbrytere, mekaniske tastaturbrytere, dørbrytere, etc.
For bedre prisgaranti, ledetid, og kvalitetskontroll, vi skaffet oss Huizhou Greetech Electronics Co., Ltd i 2021. Vi gjorde det til vår produksjonsbase i Kina med over 1000 ansatte og 260 millioner stykker/år produksjonskapasitet.
Huizhou Greetech is an ISO9001, IATF16949 and ISO14001 certified micro switch manufacturer whose whole series of products have been granted global access permit certifications, including ENEC, UL, CE, CB, etc.
Med datterselskapet salgsavdeling Guangzhou Unionwell Sensing & Control Technology Co., Ltd grunnlagt, our global reach covers North America, Europa, Asia, og Sør-Amerika.
Our business partners/end customers are Global 500 bedrifter, inkludert verdenskjente merkevarer for husholdningsapparater og ledende billeverandører i Nord-Amerika og Europa.
Om kort tid, vi er launching a new industrial base at Longmen, Huizhou, Guangdong-provinsen; automatiseringsutstyr vil bli introdusert, som ville forbedre bryterproduksjonskapasiteten betydelig fra 260 millioner stykker til over 1.3 milliarder stykker/år.
A one-stop system vil dekke produktutvikling, presisjonsstøping, sprøytestøping, presisjonsstempling, automatisert utstyr R&D, montering, og testing.
Det profesjonelle salgsteamet er tilgjengelig for å gi hjelp og rask respons på 3D-tegningsforespørsler, pristilbud, og tilgang til et tilstrekkelig eksempelprogram som lar ingeniører teste og kvalifisere brytere for deres sluttproduktapplikasjoner.
We welcome you to login into our website:https://www.unionwellswitch.com/ and email us at this email: inquiry@unionwellswitch.com